Articulating display pods tested: SeaView, ScanStrut & NavPod
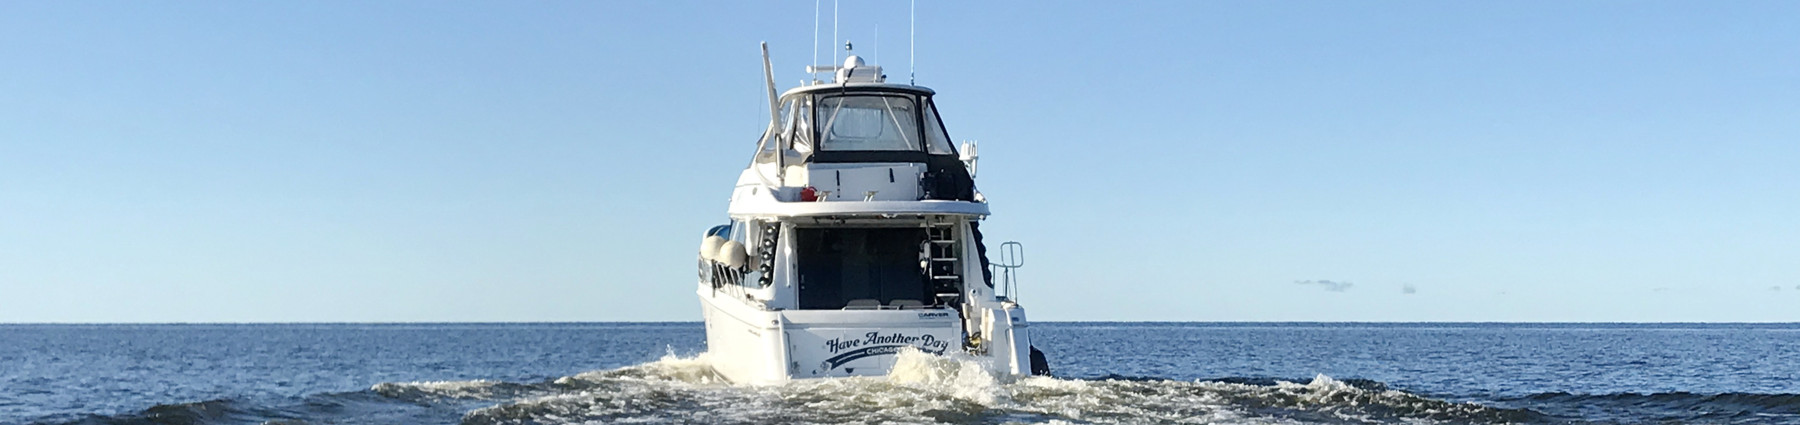
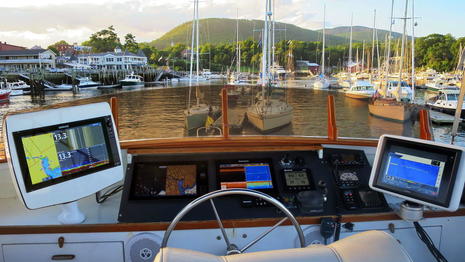
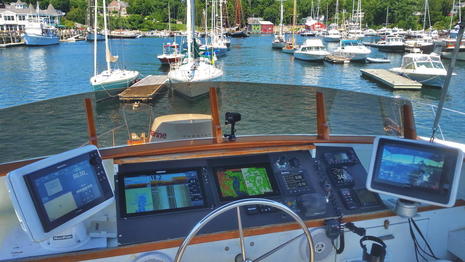 The latest multifunction displays (MFDs) look smashing on Gizmo’s flybridge, I like to think. And it’s not just that Raymarine, Simrad, Furuno, and Garmin — that’s the lineup, left to right — have almost all further evolved the black glass style that promises to be with us for a long time. Those two articulating pods also contribute to the clean look, plus they make it easier for me to use the podded MFDs from different spots on the bridge. It’s time to discuss the SeaView, ScanStrut and NavPod articulating pods I’ve tried in the last few years…
SeaView Power Pod
 You may recall Gizmo’s first glass bridge testing setup in 2014, when that big SeaView Power Pod rather dominated the port side. That wasn’t SeaView’s fault as it took the largest of their five Power Pod sizes to fit the Simrad NSS16 evo2, but it did teach me that the smallest possible pod may often be the right one. And that may be regardless of manufacturer as all of them are making quality competitive pods.
In fact, the SeaView design held up fine from Maine to North Carolina and back again, solidly holding the NSS where I wanted it, whether I was in the helm seat, standing up or in the port mate’s seat. (However, it sometimes blocked the view of my petite and favorite mate, and that’s a big reason that I just moved the NSS16 to the dash panel; her wishes count ;-).
 Here’s the SeaView pod before MFD installation in 2014. Note that it only has one gasket between the back and faceplate while both the ScanStrut and NavPod designs use two, but there are 10 fastenings holding that joint tight and, besides, a little water intrusion isn’t really an issue with electronics that are designed to be exposed in a bail mount. The main point of an articulating pod is being able to adjust viewing and touch angles, and the big pluses with any pod are good looks and the protection of cabling from physical damage. Note that this SeaView faceplate came perfectly precut for the NSS16, even to the tiny screw holes.
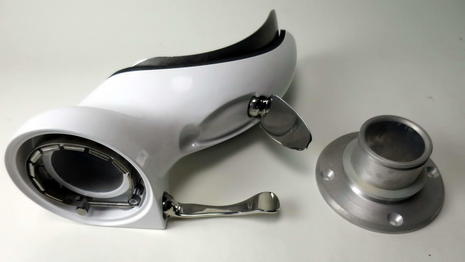 I was also impressed with the SeaView’s separate swivel and tilt mechanisms. ScanStrut’s combined ball and socket mechanism is easier if you want to adjust both at once, and it offers more tilt freedom, but often I just want to swivel the screen to get a better seat or sun angle. The maximum tension on both of the SeaView controls can also be easily adjusted, but when the locked ScanStrut mechanism gets a little loose, it’s a much fussier maintenance operation. Finally, while tilting the SeaView Pod did often take some two-handed effort, that may be due to its extra large size.
SeaView also offers swivel only Power Pods and all these manufacturers offer the fixed pods more appropriate to sailboat helms, as does Edson.
ScanStrut Deck Pod
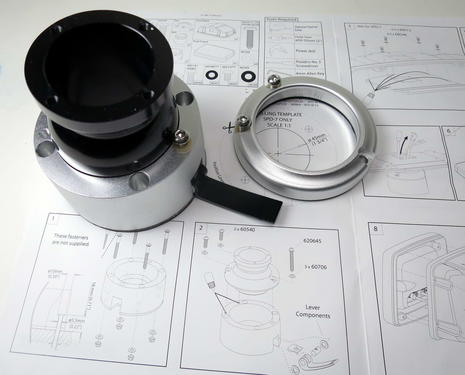 Here’s a partially disassembled look at the fully articulating base of the ScanStrut Scanpod Deck Pod. It’s those three fasteners in the retaining ring, particularly the one extending to the lock lever, that are a bit fussy to adjust. But then again, the relatively heavy Garmin 8212 took almost two long seasons of sometimes hard pitching in the SPD-12D size Deck Pod before the base needed adjustment, and I regularly flipped it around with one hand on the pod and one on the lever.
 Actually, I tested the first generation Deck Pod in 2009 and am grateful that ScanStrut removed the logo bump in this version. The double gasketing and fastening design are also improved, and here you can see the internal backing plate that helps make this articulating pod so solid when locked (as a similar one does with the SeaView). As with the first Deck Pod, though, I had a little trouble cutting the faceplate well…
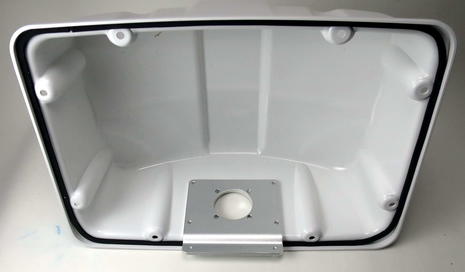
 …and if you click this photo bigger you might notice that the 8212 ended up slightly out of kilter. I also included the cutout in this 2014 photograph and notice that Garmin did provide a nice adhesive template. And while I may not be perfect at layout, I have learned to use a really toothy jigsaw blade and to cut very slowly so that the thick dense plastic doesn’t melt and reseal itself.
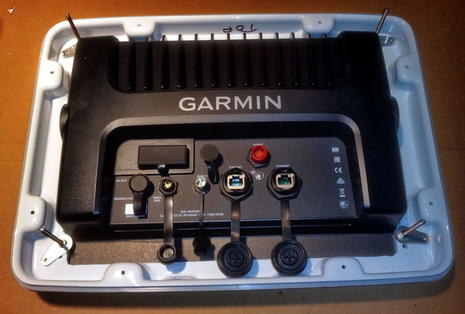
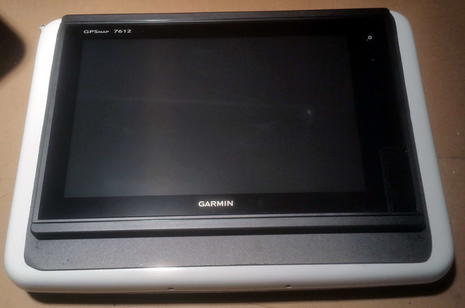
But this season I faced the task of making the hole smaller for the lighter — and less expensive yet arguably more powerful (a nice trend) — Garmin 7612.
A big hole smaller?
 This is an aside for sure, and probably not fit for a proper yacht, but some of you may appreciate the thin, black, expanded PVC sheeting I used to mask the Deck Pod’s oversize hole as well as for rejiggering the flybridge’s already expanded PVC dash panel. The sheeting is cheap and can be cut with a utility knife. Many other thicknesses are available, but this 3mm stock bridges gaps like the one above fine, and so far no Gizmo visitor has seemed to notice.
NavPod PowerPod
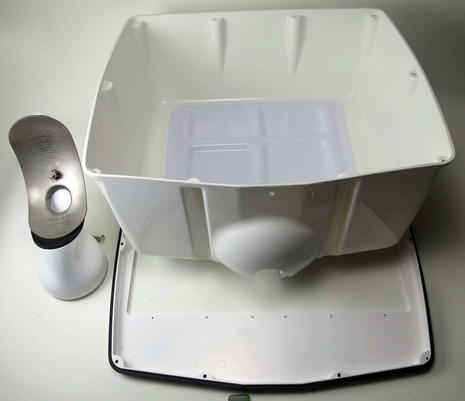
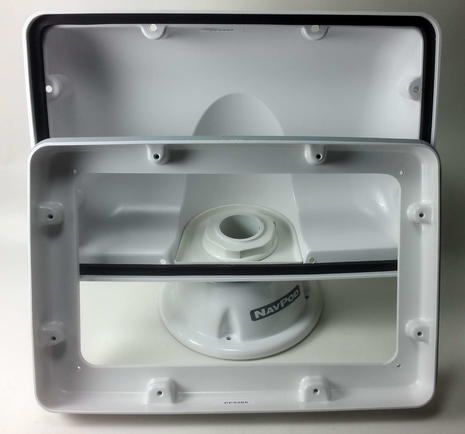 The Ocean Equipment NavPod Gen3 PowerPod just went on Gizmo last week, but I have many reasons to think that it will hold up very well. Note the heavy duty construction and dual (gray and black) gasketing, for instance. And whereas this PowerPod only swivels, the mechanism is quite straightforward and appears bulletproof. (Note, too, how NavPod cut a perfect faceplate hole for the Raymarine eS128, such a time and frustration saver.)
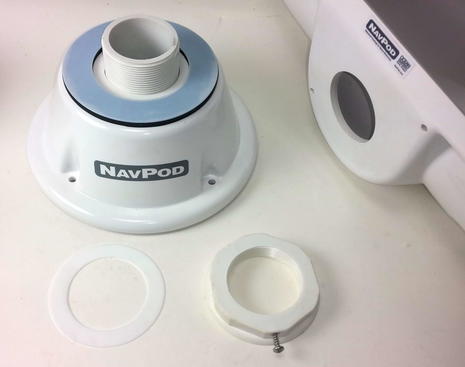 In fact, I really didn’t need to take the NavPod swivel apart; it already turned very smoothly and then stayed where you left it. But it is impressive to see the delrin bushings and large cushioned turning surface, and if it ever did swivel too easily, it’s not much trouble to back off that retaining screw and tighten the big nut.
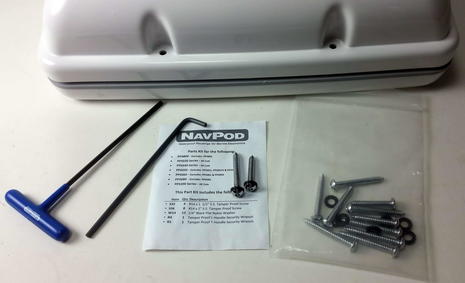 Like the SeaView and ScanStrut pods, the NavPod came with stainless tamper-proof fasteners and the special tool needed to use them (two in NavPod’s case). That may look like an allen wrench, for instance, but its tip is hollow, and maybe that would frustrate a marina thief.
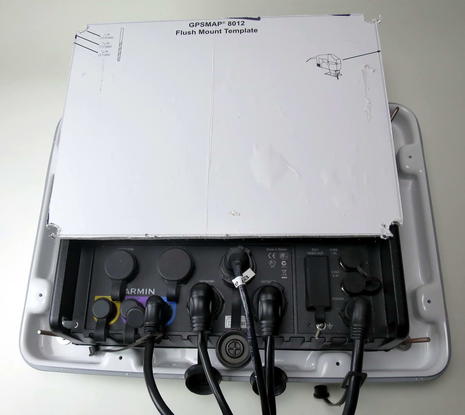
Finally, let me point out that all three of these pods are designed so that many cables can be run through their bases and thus kept completely out of sight (or danger) at the helm. That’s not how I use them on Gizmo because I’m trying to minimize the testing damage to that fixed (and balsa cored) flybridge shelf, but the pods are still darn useful. Note how the VirbXE camera in the middle of this photo is showing on the 7612, because next up is an entry about Garmin’s wondrous wireless features.


No wonder you knew exactly who made the instrument pod on Atsa this afternoon 😉 I was very impressed with our NavPod – and “measure twice, cut once” has always worked well for me.
I have looked at these for a year now. I was wondering if there is any possibility to running the wires thru the back of the pod, as opposed to running it thru the swivel.
I really can’t run my wires thru the swivel as the below the helm surface where it would mount is the head.
No problem, Ron; all you need is hole saw big enough for the largest connector going to your MFD 😉
Seriously, if you look carefully at the NavPod and SeaView installs above you’ll see that all the cables run out the lower right back and then behind the dash panel. It’s not the way the pods were designed to be installed, and not as waterproof, but it works fine.
Just debur the hole with file and/or sandpaper and leave enough cable slack so that the pod tilts and turns without restriction. And note that you can make the install look tidy by covering the cable bundle with white split loom tubing like this…
https://www.amazon.com/s/ref=nb_sb_noss?url=search-alias%3Daps&field-keywords=white+split+wire+loom+tubing&rh=i%3Aaps%2Ck%3Awhite+split+wire+loom+tubing
…though I haven’t gotten around to that detail yet.
Thanks Ben I did notice that. I too have a Duffy! 🙂
In running the cables out the lower right back of the pod did you make a new hole in the back of the pod?